Page 256 of 324
Re: warning - Not so much a Bultaco story
Posted: Sat Nov 21, 2020 9:40 am
by David Lahey
Greg Harding wrote:Hi Everyone,
On another note and after some head scratching, I managed to get the old vice apart, all of the bolts had a black tar type substance on the threads, I think Stockholm Tar was used on old threads? Anyway whatever it was made my job easier and I saved every bolt and nut. Years ago I pulled apart a broken John Heine folder and saved the bolts which were the right size to replace the ones that were removed for mounting to the Hardwood block so back to original now. The screwbox and screw was a bit harder but I psyched it out by laying all of my biggest tools next to it on the workbench and looked at it for a while with determination. Big Ridgid Stiltons and some leverage saw it Crack undone, to my amazement the thread was not rusty inside the screwbox. It was chock a block full of dirt/ silt that must have been left from the floods it endured!
That old vise looks fantastic Greg. I am wondering if you will be using it day-to-day or is it for special occasions/admiration/display? Maybe it's a resto for a customer?
I couldn't help thinking about the practicalities of the design and suspect that it is actually a better thing in some ways than later designs in that there is better access to whatever is being held due to the narrowness of the vise under the jaws.
Your preparation for attempted disassembly "looking at it for a while with determination" is a wonderful technique and I do a similar thing when entering the unknown. In my case, it is to give my brain time to consider all options for how to proceed without causing too much damage. The laying out of "all my biggest tools" "to psych it out" is a new one to me but at times I do talk to things I'm working on and find it greatly helps the mental processes.
Sounds like Stockholm tar was an early anti-seize and rust preventative and actually worked. I remember from my youth that when assembling (tapered) pipe threads we would use greased hemp (before the invention of PTFE thread tape) and it worked well and you could disassemble old joints but probably wasn't as hygienic as virgin PTFE.
Re: warning - Not so much a Bultaco story
Posted: Sat Nov 21, 2020 10:04 am
by David Lahey
Greg Harding wrote:Hi Everyone,
David, Good quality things that are popular will always stimulate aftermarket parts when all genuine spares are exhausted. For example, you can buy absolutely anything for a Grey Fergy! Now that you mention it, I think my :Bultaco: M49 has woodruff key clutch basket drive? What model did they change to spline drive?
What a fantastic question Greg. What I do know is that it is the sort of thing that would have changed during a model number period, rather than at the time of a new model number, because that's how

rolled.
The timing will be early 1970s and I suspect near the end of the model M49
Sherpa Ts run or the model 80
Sherpa Ts and Alpina model 85s, which apart from a couple of gear ratios, was the same as the Sherpa T engine.
Not Bultacos
Posted: Sun Nov 22, 2020 4:08 pm
by David Lahey
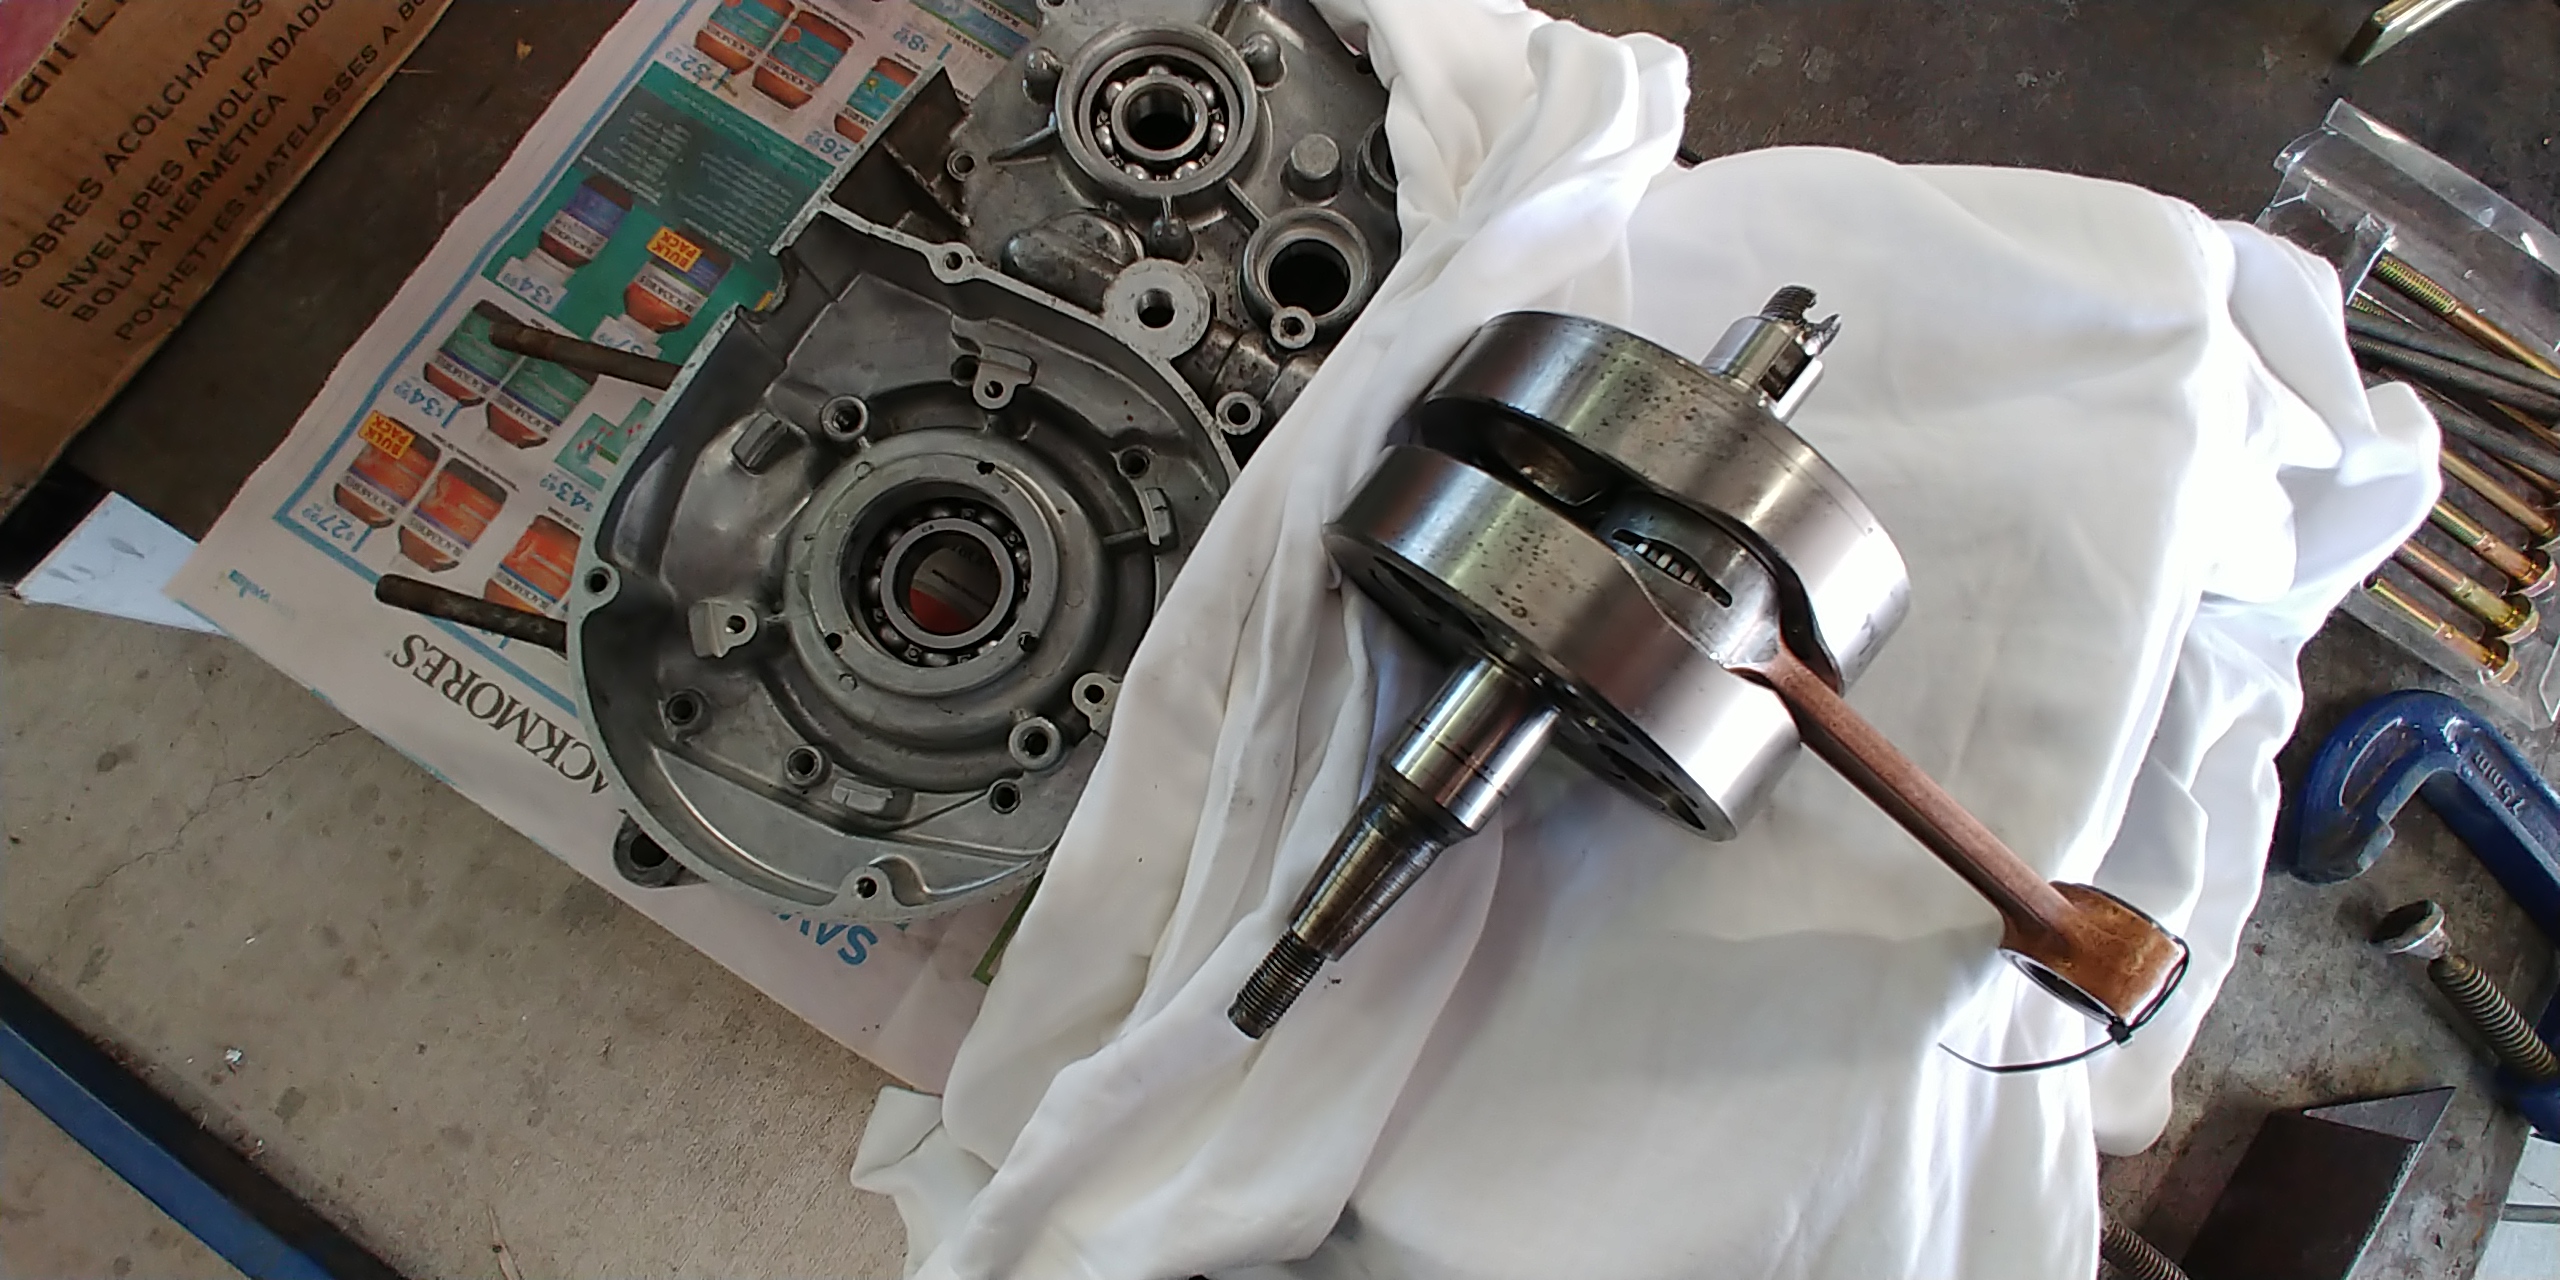
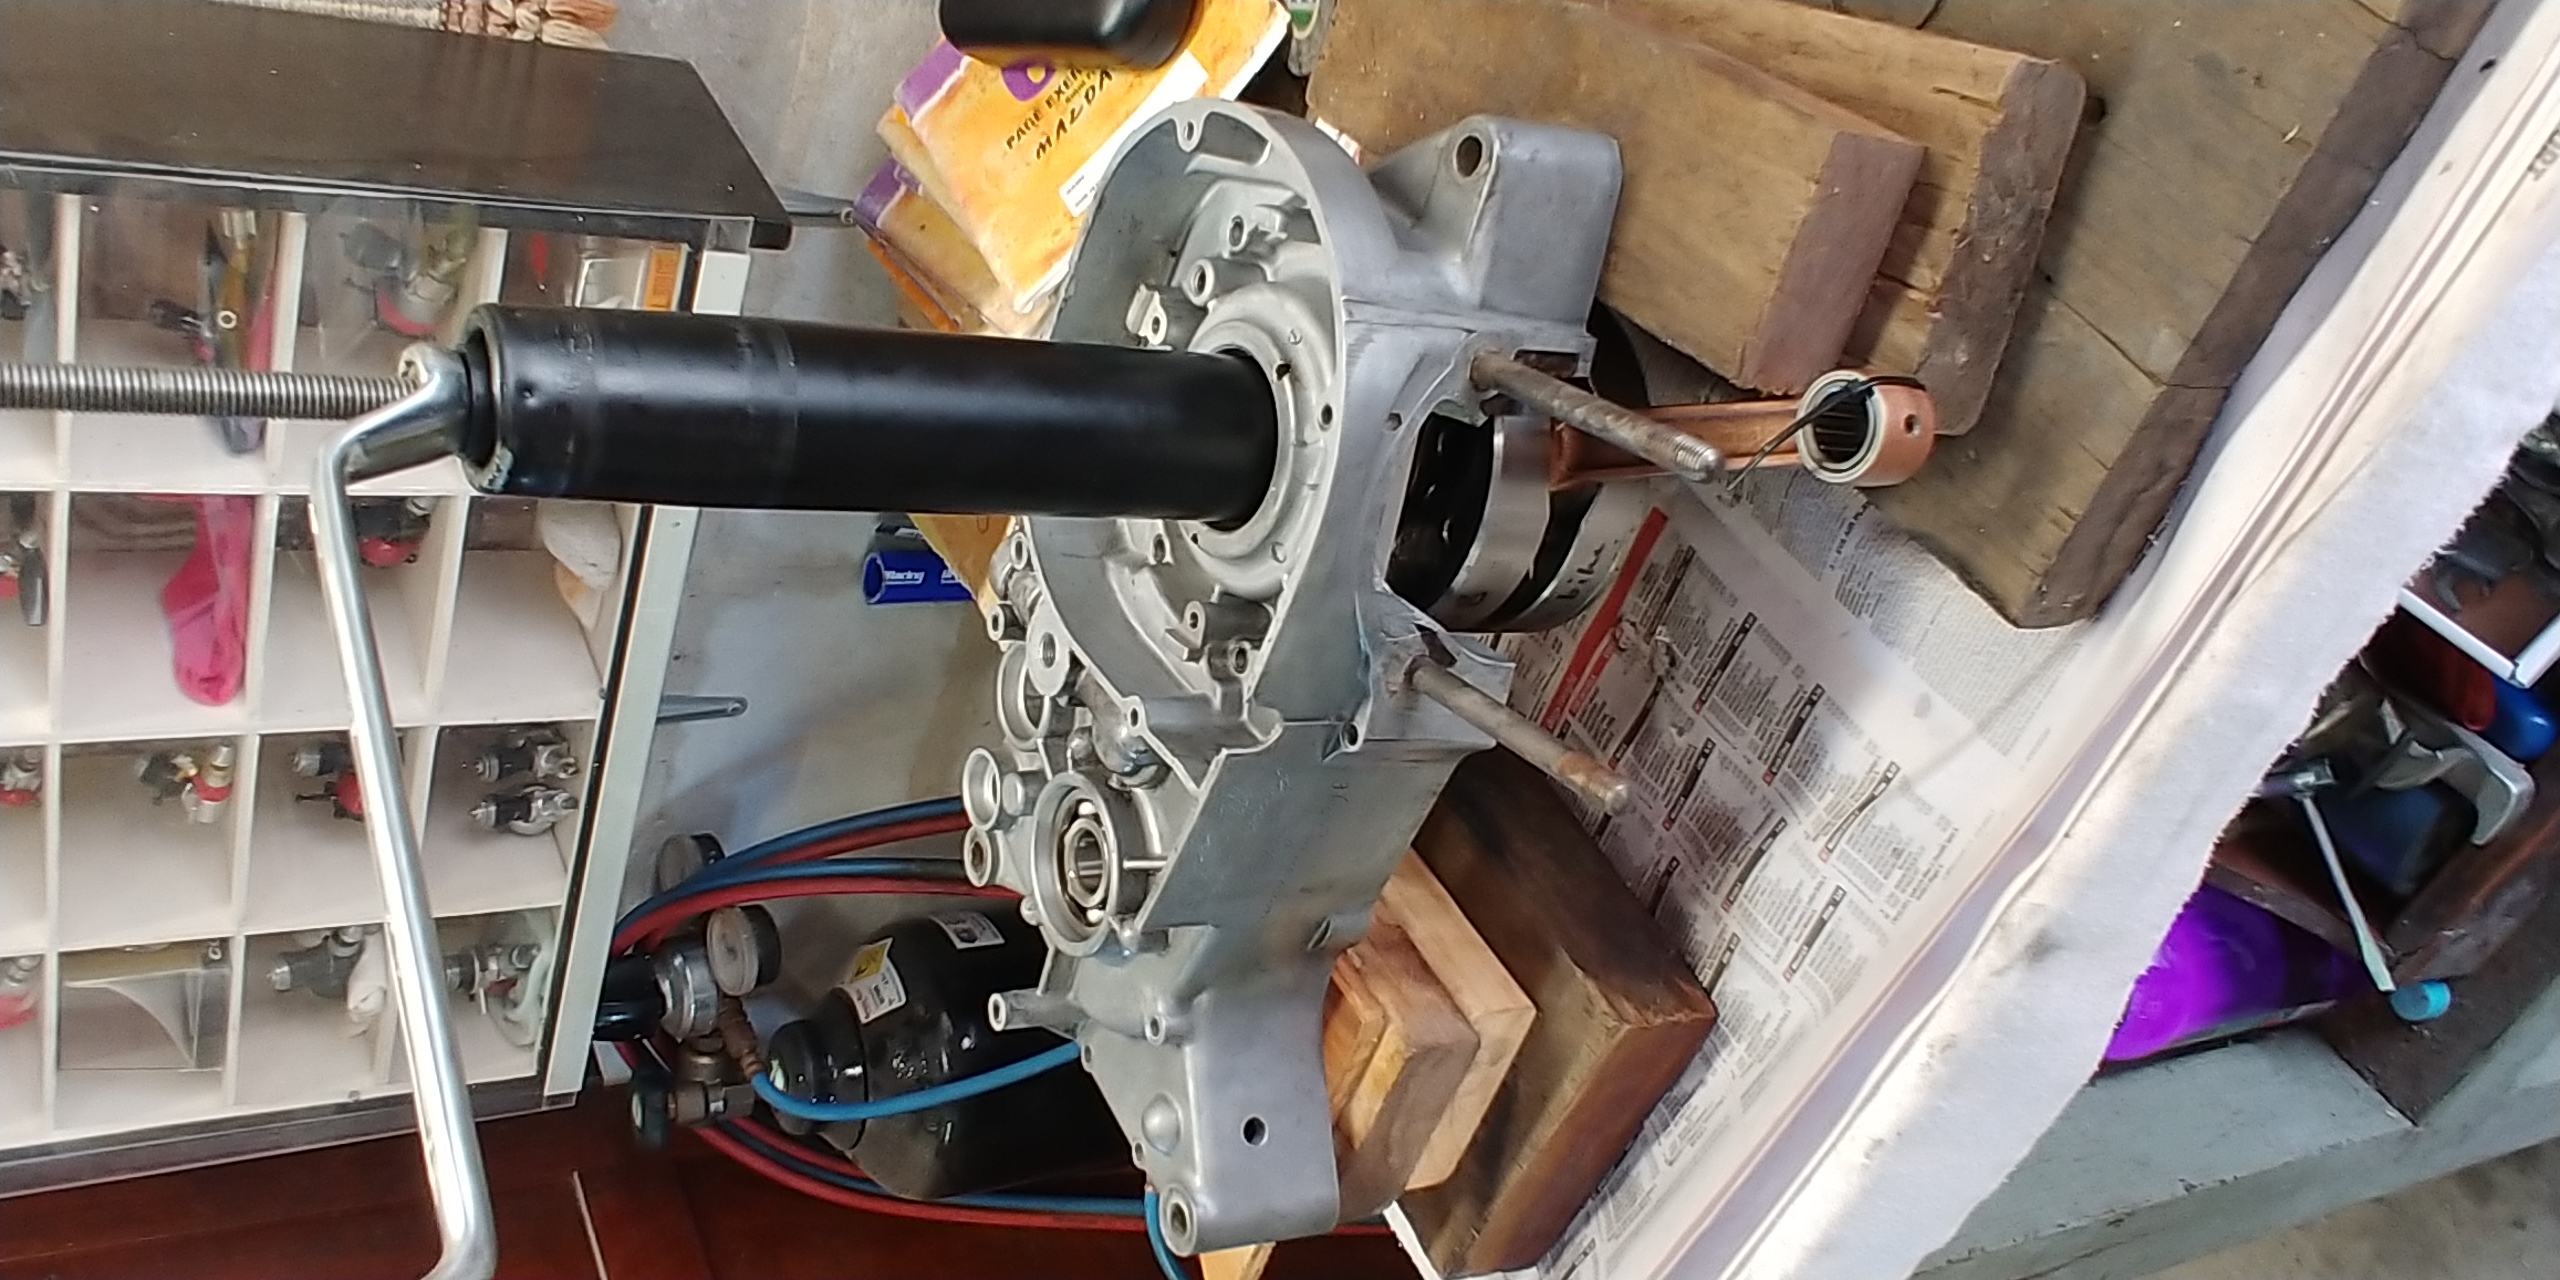
Yamaha TY twinshock crankshafts have a light interference fit in the left side main bearing. I've reassembled lots of TY175 motors before and it has been possible to pull the crankshaft in using a flat steel plate with three holes in it, but it is a slow process and I've always wanted to do it with a pulling tool like they say to use in the workshop manual, but until now I haven't bothered making one.
The special occasion that motivated me is my first reassembly of a TY250 motor.
- 20201122_105502.jpg (1.07 MiB) Viewed 2277 times
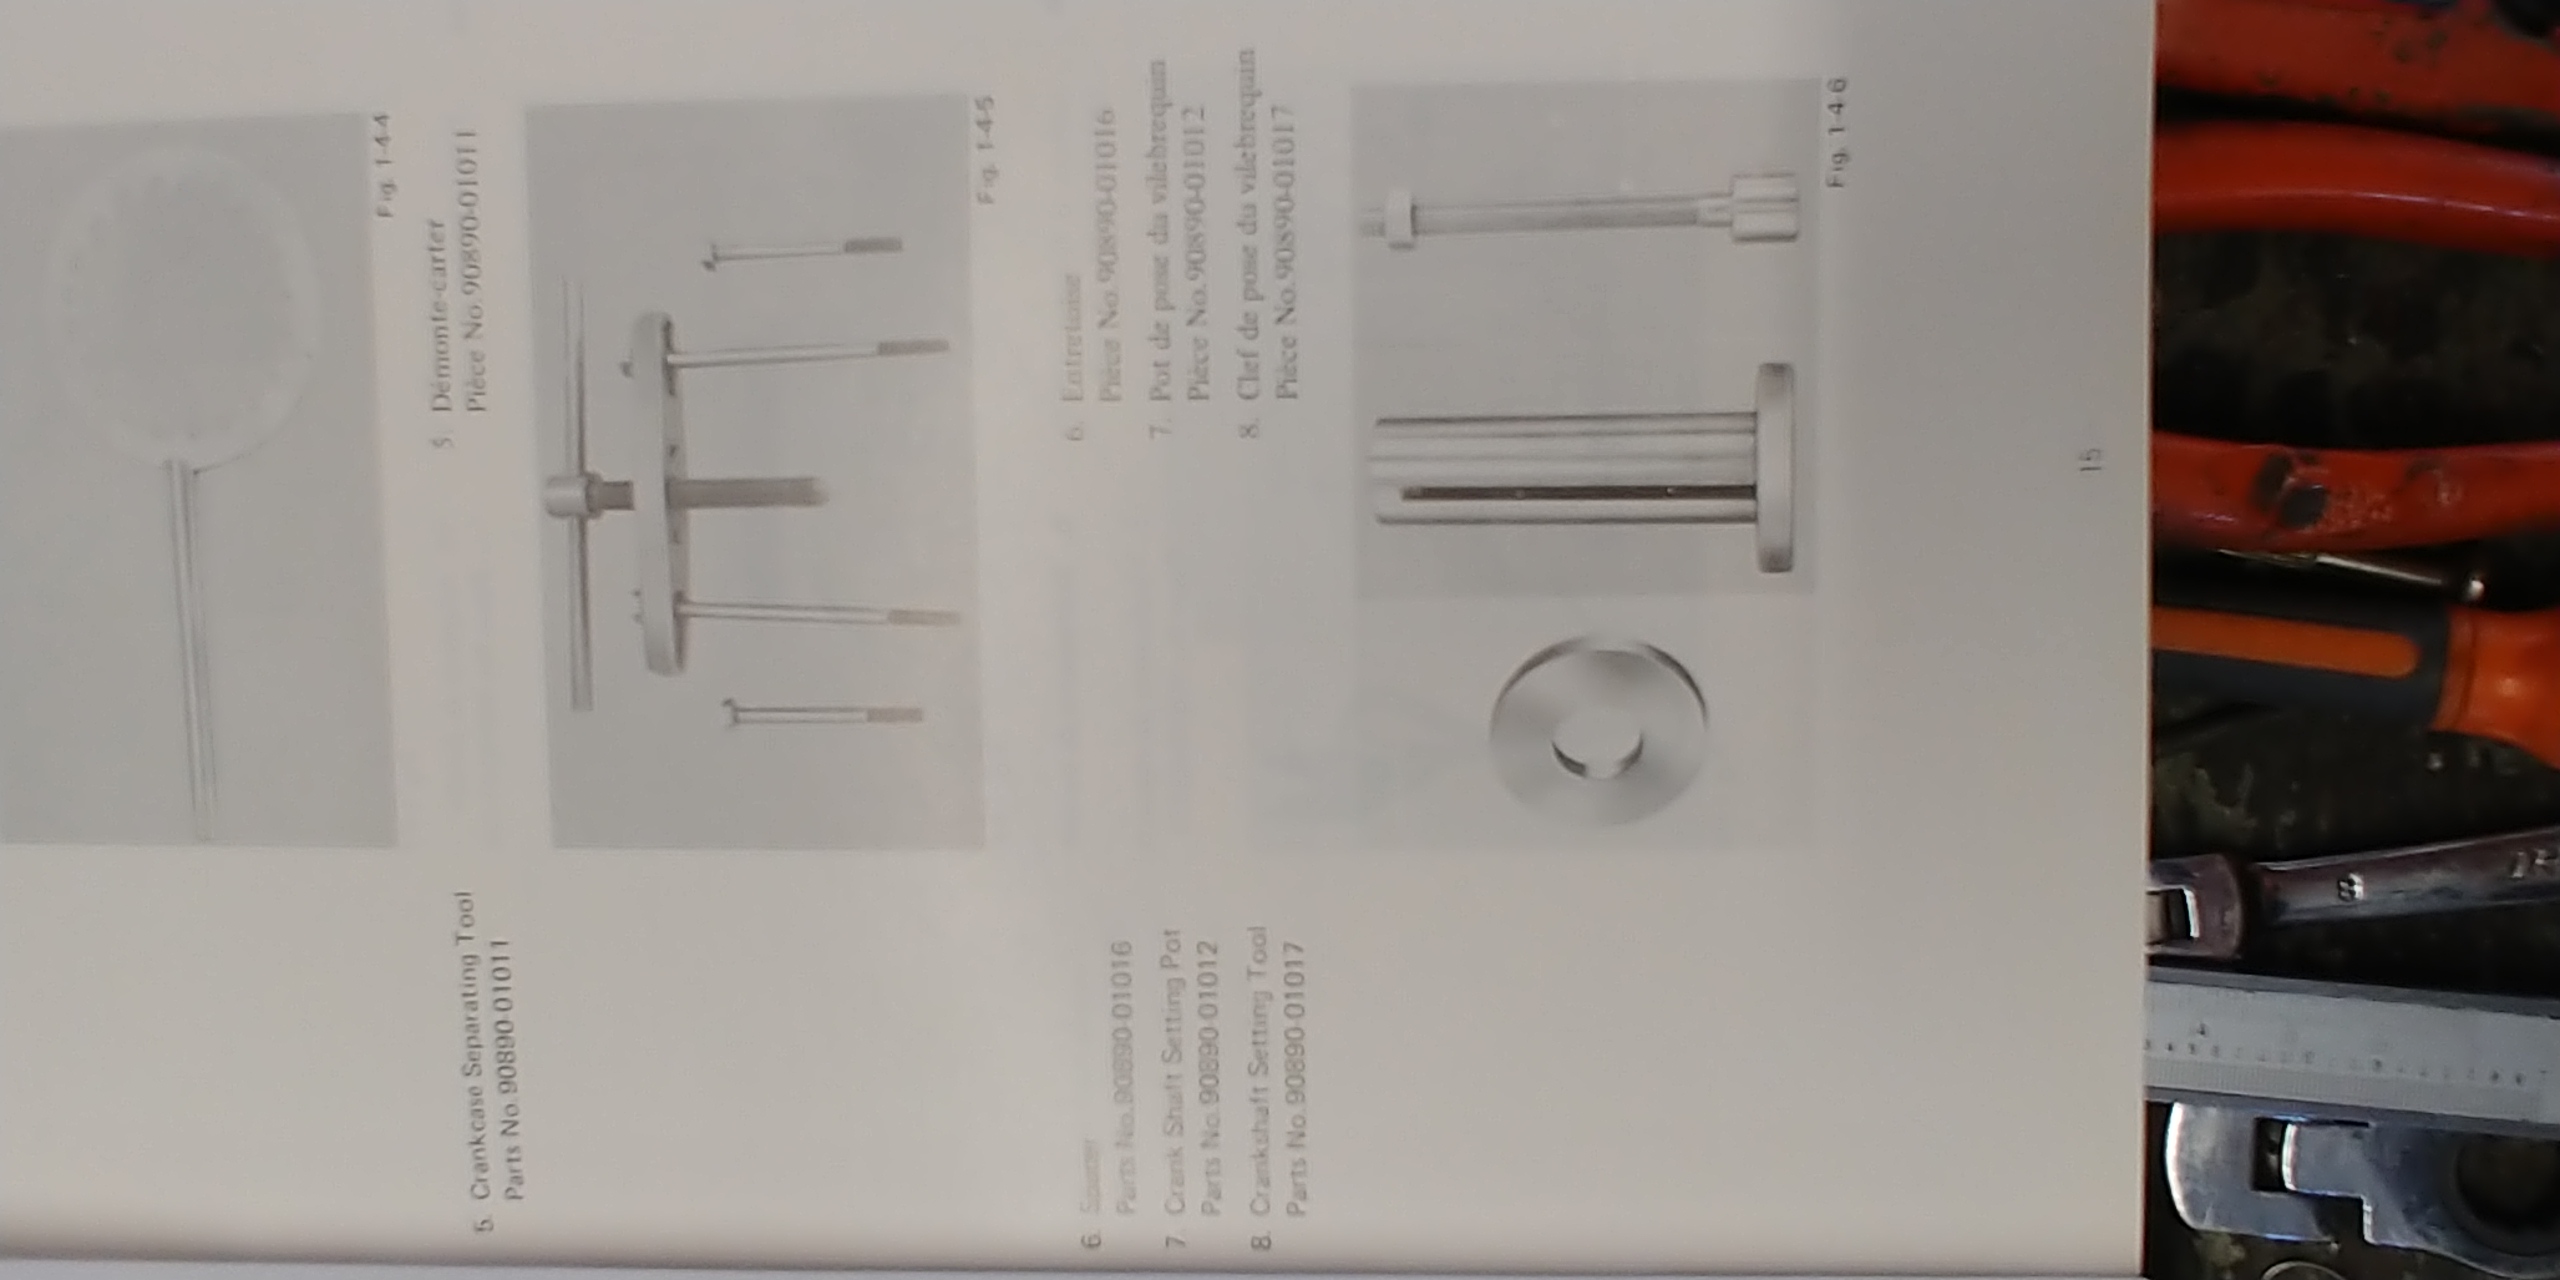
This is what the Yamaha pulling tool looks like.
- 20201122_105543.jpg (486.11 KiB) Viewed 2277 times
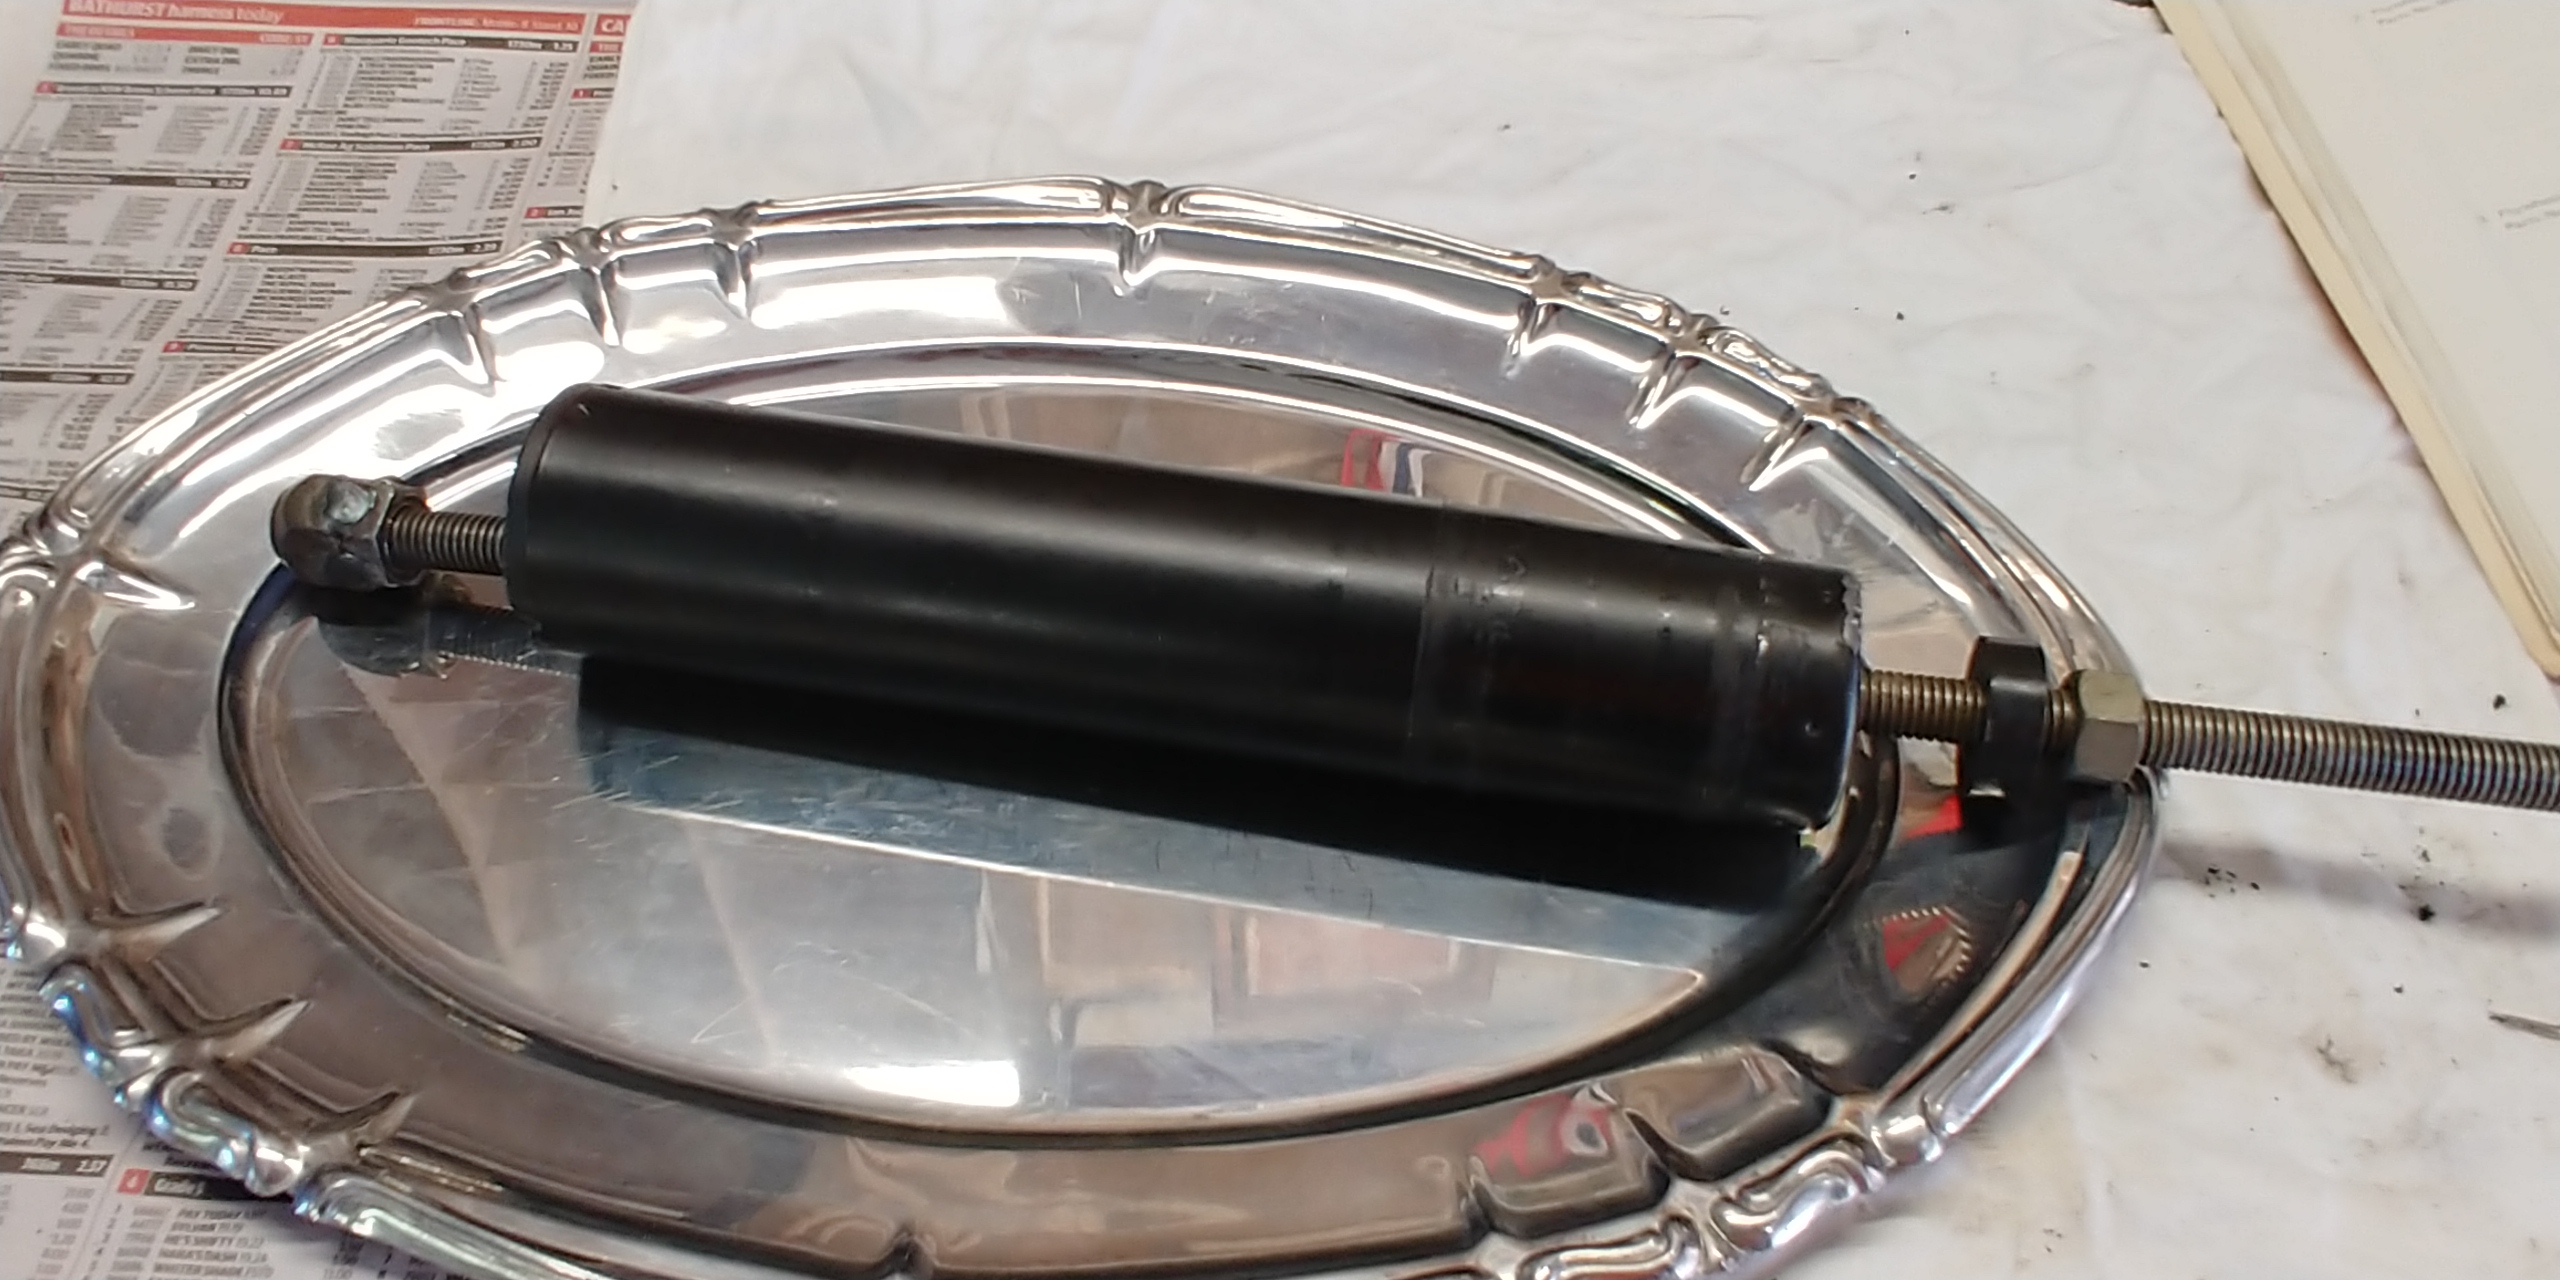
To make a tool I needed a piece of tubing big enough to fit over the crankshaft to push against the bearing inner race. I used a piece of light steel tubing from an old office chair post that I had kept for a rainy day. One end had a plastic bush in it that was almost big enough to go over the crankshaft so it got machined out a few mm and being plastic will protect the crankshaft seal contact area from damage. The other end had a flat plate with a 13mm hole in the middle which was perfect for the puller rod to go through.
For the puller rod I used a piece of 12mm threaded rod from Bunnings.
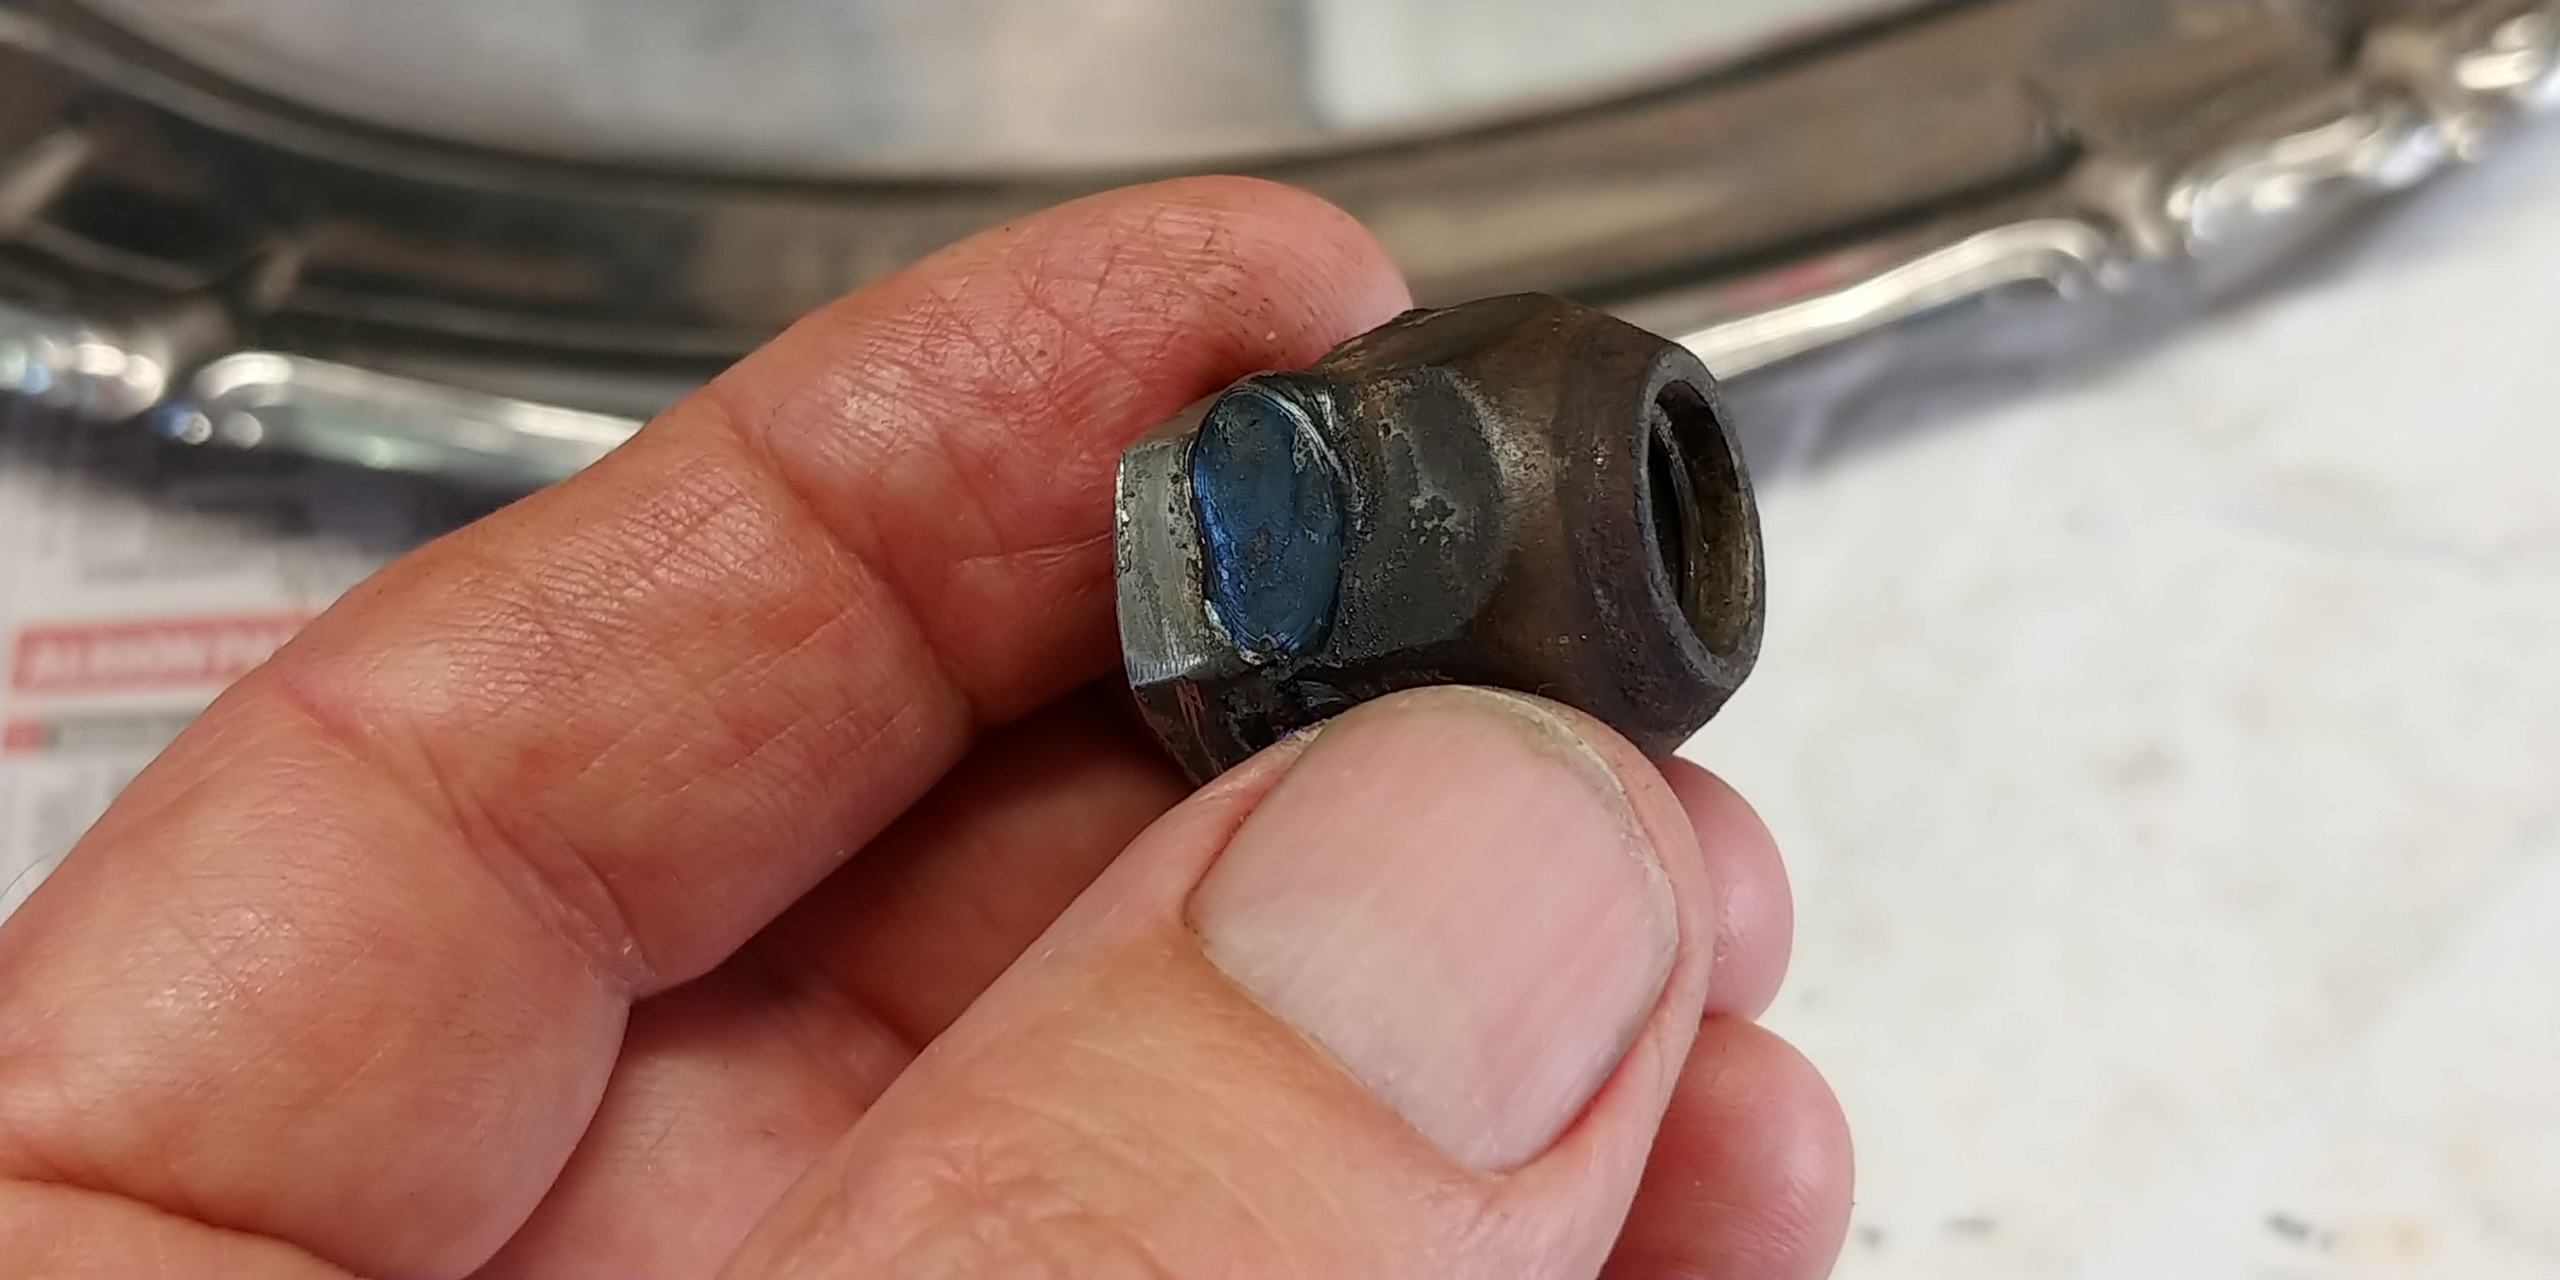
To connect the puller rod to the crankshaft thread I found that a wheel nut from a 1968 Datsun 1600 from my youth was the right thread, so it got welded to a nut that suited the threaded rod.
- 20201122_105714.jpg (829.96 KiB) Viewed 2277 times
Here are the pieces on a Team Hardwood display tray:

- 20201122_105623_HDR.jpg (931.33 KiB) Viewed 2277 times
- 20201122_105958_HDR.jpg (892.59 KiB) Viewed 2277 times
Here it is in position:
- 20201122_111303.jpg (1.11 MiB) Viewed 2277 times
It wasn't plain sailing though. Just as the crankshaft shoulder reached the bearing, the plastic bush broke. I wasn't certain that the crank was all the way home, so made a plug from 5mm aluminium plate that fitted into the end of the steel tube. Again, having that part made from something soft will protect the seal contact area on the crankshaft.
Re: Basket Cases
Posted: Sun Nov 22, 2020 9:16 pm
by Bully fanatic
Looks good David. I have just made a CR 430 Husky crank remover to use on a Husky motor that someone gave to me to fix for them. The kickstart idler gear was broken and that side crank case had a big crack in it too. Then I had to make one to get the crank back in.
Re: warning - Even less of a Bultaco story
Posted: Sun Nov 22, 2020 10:01 pm
by Greg Harding
Hi Everyone,
David Lahey wrote:
That old vise looks fantastic Greg. I am wondering if you will be using it day-to-day or is it for special occasions/admiration/display? Maybe it's a resto for a customer?
I couldn't help thinking about the practicalities of the design and suspect that it is actually a better thing in some ways than later designs in that there is better access to whatever is being held due to the narrowness of the vise under the jaws.
David, Yes Yes Yes Yes and Yes as I must be the customer plus I wanted to see how many

NUTS I could Crack at a time. And Yes this is my preferred style of vice, like all machines/tools, it has limitations and this is the biggest vice I have ever seen. The clearance around the jaws is impressive and it opens over 12 inches, even more if you are happy with less screw in the screw box. While on the subject of the vice, I want to clarify that when I said I picked it up, I did not mean it literally! In fact 2 of us struggled to slide it up the back of the trolley into my trailer.
- 1606040494374.jpg (99.23 KiB) Viewed 2255 times
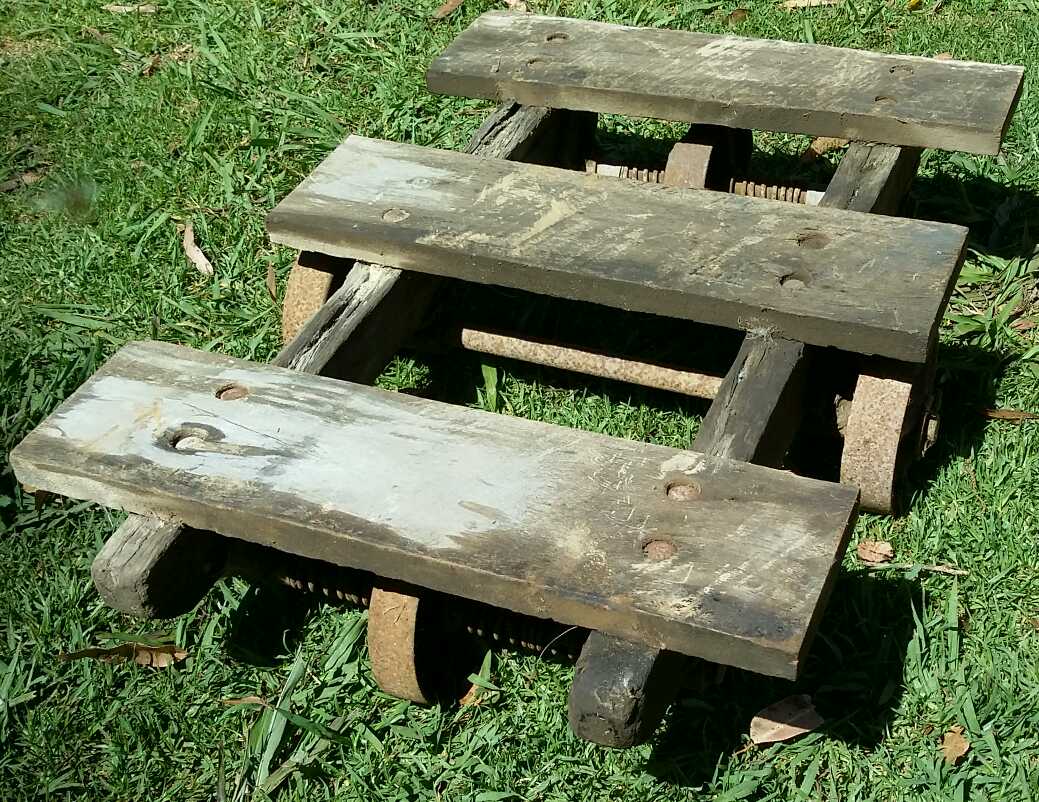
With the Hardwood block and mounting bolts, it was about 90 Kilos! My intentions are to use it as even though it could be well over 100 years old, the action and feel is excellent. My plans are to make a trolley to wheel it around and attach with a quick release to the leg of my gantry when things get serious. Like most things I do, sort of backwards as I am rebuilding/ building from the top down. Next is to build the middle bit and steel base to utiliser these axles and wheels:
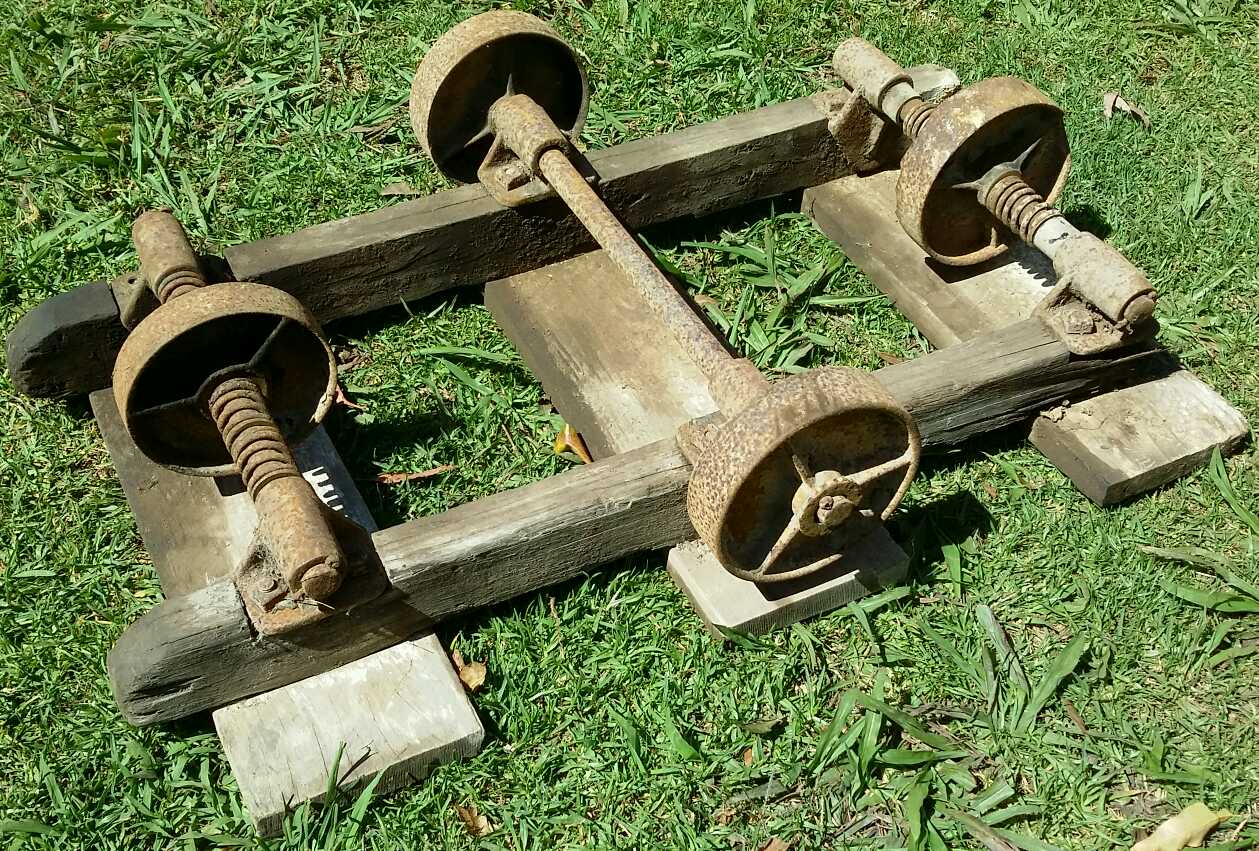
- 1606007750383.jpg (268.13 KiB) Viewed 2255 times
This came to me yesterday and I have never seen a Piano Trolley like this before, as for being period correct, I think it predates Castors? The middle axle is slightly lower then the spring loaded wheels on each end allowing you to steer it without the wheels steering. Finally, Yes I like the look!
- 1606007731275.jpg (170.86 KiB) Viewed 2255 times
Re: warning - Even less of a Bultaco story
Posted: Thu Nov 26, 2020 8:09 pm
by David Lahey
Greg Harding wrote:Hi Everyone,
Like most things I do, sort of backwards as I am rebuilding/ building from the top down. Next is to build the middle bit and steel base to utiliser these axles and wheels:
The attachment 1606007750383.jpg is no longer available
This came to me yesterday and I have never seen a Piano Trolley like this before, as for being period correct, I think it predates Castors? The middle axle is slightly lower then the spring loaded wheels on each end allowing you to steer it without the wheels steering. Finally, Yes I like the look!
Yes indeed nice wheels and axles and they match the vintage look of the vise very well. I'm wondering why you are calling it a piano trolley? If you hadn't mentioned "piano" I would have just assumed it was a general purpose trolley like what I've seen people using in very old movies for loading and unloading ships/trains whatever before containerisation and bulk solids transport happened

- Port_london_chilled_beef_1935.jpg (136.74 KiB) Viewed 2129 times
By Unknown author - Archivo General de la Nación Argentina, Public Domain, <a href="https://commons.wikimedia.org/w/index.php?curid=51613831">Link</a>
Re: Basket Cases
Posted: Fri Nov 27, 2020 7:32 pm
by Gary Mc
Greg Harding wrote:Hi Everyone,
David Lahey wrote:So I decided to have a closer look at the all-aluminium :Bultaco: rear hub I posted up a photo of a couple of days ago. When I lifted it up for a better look I found another all-aluminium :Bultaco: rear hub hiding underneath.
I then realised that they are quite different and this might give clues to :Bultaco: experts who might see this posting to identify what :Bultaco: models they might be from.
I see that one of them has 28 spoke holes while the other has 36 spoke holes. I figure the 28 spoke hub is made for a small diameter :Bultaco: rim because old 18" wheels usually have either 36 or 40 spokes.
Both have 140mm diameter brake drums.
Does anyone know what :Bultaco: s they are from?
You are on to it David, 28 spoke holes is what I got when I first laid eyes on that hub of yours. My first thoughts were :Bultaco: Tiron but the hubs are different and looks like many more spokes to me?

- Bultaco Tiron hubs 1.jpg (113.87 KiB) Viewed 2071 times
While we are going, I think this is outside Post Classic Era but has 28 spokes in a 19inch Akron rim:
Hi everyone, just for reference in this discussion about Bultaco hubs, here are some pics of a Bultaco Tiron front and rear hubs, they have 36 spokes front and rear
Re: warning - Even less of a Bultaco story
Posted: Tue Dec 01, 2020 10:20 pm
by Greg Harding
Hi Everyone,
David Lahey wrote:Yes indeed nice wheels and axles and they match the vintage look of the vise very well. I'm wondering why you are calling it a piano trolley? If you hadn't mentioned "piano" I would have just assumed it was a general purpose trolley like what I've seen people using in very old movies for loading and unloading ships/trains whatever before containerisation and bulk solids transport happened.
David, I should have used my 12 inch rule in the photo to give scale, the wheels are 6 inch diameter. Piano trolley is what the seller called it and you are right about it being general purpose as it could be used for all sorts of things and even a vice! Now that I think about it full length hinge is still referred to as Piano hinge!
David Lahey wrote:Yamaha TY twinshock crankshafts have a light interference fit in the left side main bearing. I've reassembled lots of TY175 motors before and it has been possible to pull the crankshaft in using a flat steel plate with three holes in it, but it is a slow process and I've always wanted to do it with a pulling tool like they say to use in the workshop manual, but until now I haven't bothered making one.
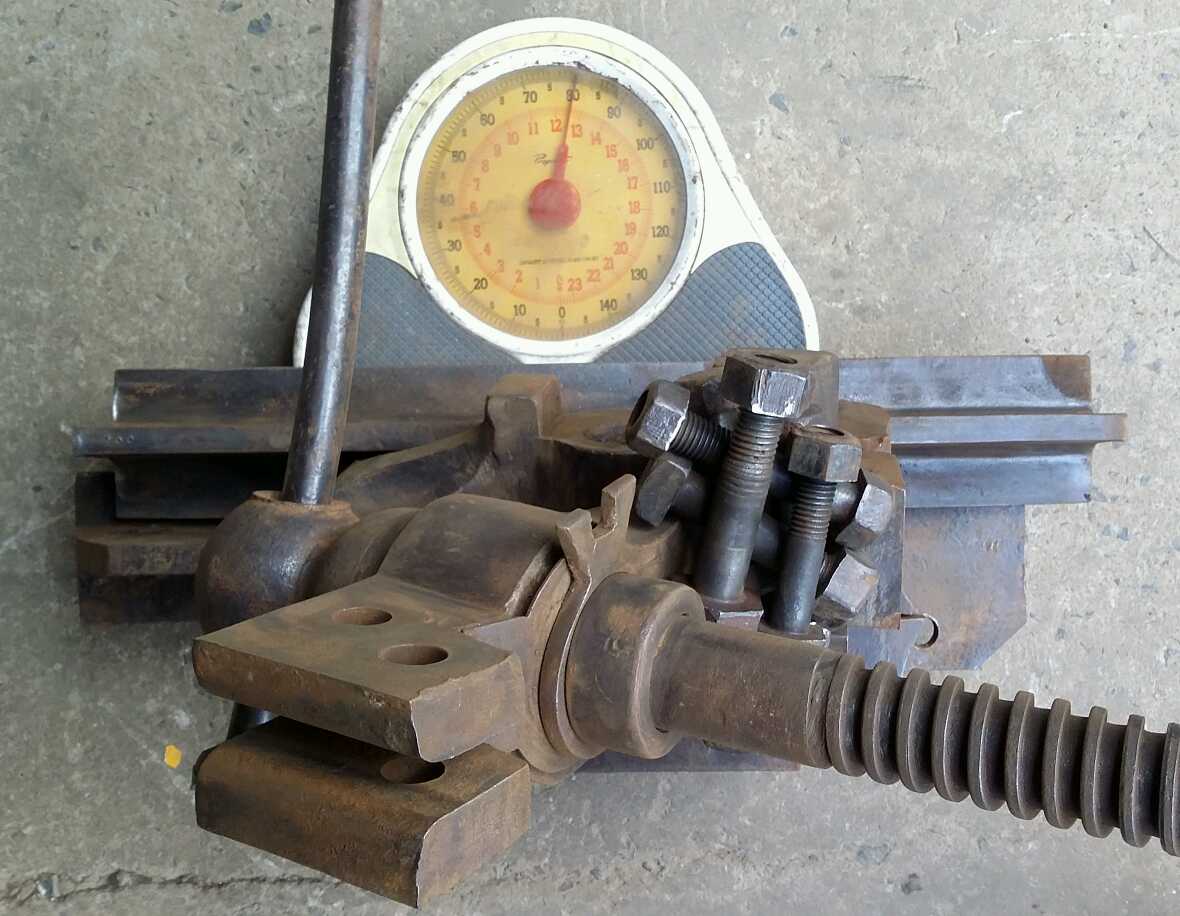
While we are talking homemade pullers, here is the puller I adapted by welding to a piece of plate for splitting cases:

- 1606819367772.jpg (91.48 KiB) Viewed 1953 times
There are plenty of options to drill more holes for other motors. 12 ton is more than adequate for this job, overkill really but there is nothing worse than running out of force when something won't come undone like a

TY 250 flywheel, I have just destroyed another TY 250A flywheel. In fact I am considering boring some of the taper out of the next flywheel to hopefully allow me to get it off again without destroying the 3rd one on this bike!
Here is another bike on display:
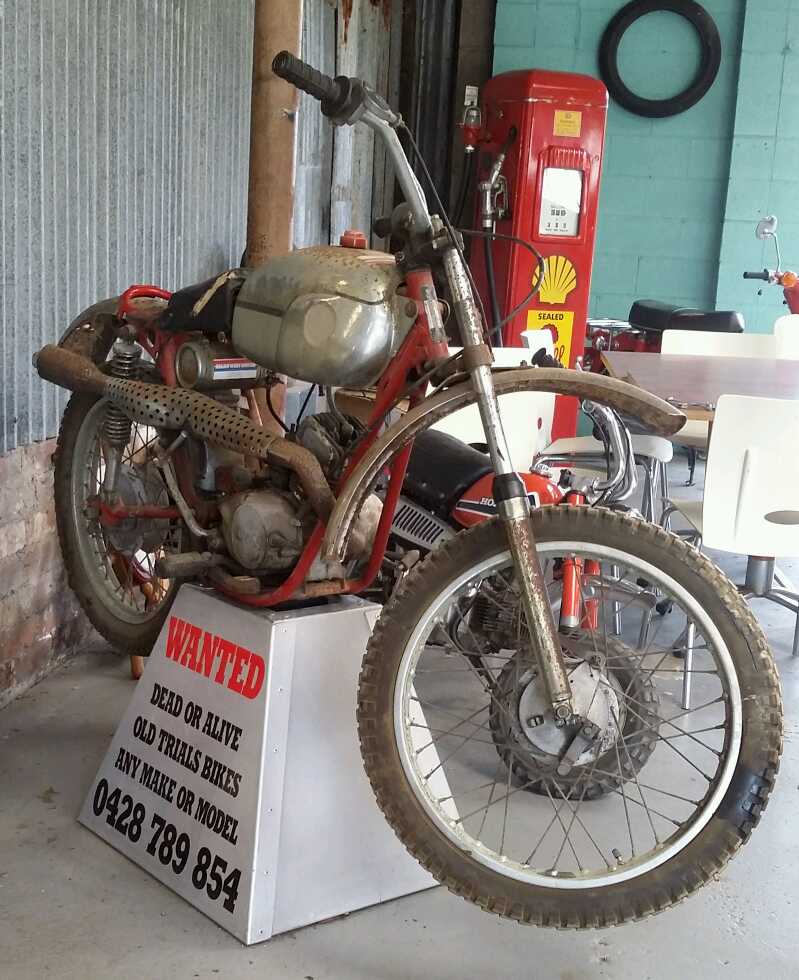
- Hodaka Ace 100 at Moo Moo Cafe
- 1606726921765.jpg (90.96 KiB) Viewed 1953 times
Re: Basket Cases
Posted: Wed Dec 02, 2020 9:03 am
by Jools
That Hodaka... without doubt the worst trailbike ever built!
And a little bit more
Posted: Sat Dec 05, 2020 8:49 pm
by brent j
Today had some time to spare so fitted a chain roller under the swingarm pivot and removed the spring loaded tensioner.
I had a piece of luck in that the lower footpeg mount was in the right spot to mount the roller. The chain tension in the lower two thirds of travel does not change. If it starts to look dodgy in the last third then I'll look at fitting a top roller.
Over many years I've done this mod on all my vintage bikes as I think it's far better than a tensioner.
I also fitted my bashplate which I picked up form the welders yesterday arvo. I still have to fot a guide onto the rear sprocket.
Test ride tomorrow!