Basket Cases

Need help finding information or parts for that old machine in your shed? Someone in here will know!

Moderator: Moderators

David Lahey
Champion
Champion
Posts: 4117
Joined: Thu Jun 05, 2003 7:01 pm
Club: CQTC Inc, RTC Inc
Bike: Many Twinshocks
Location: Gladstone, Queensland

Re: Basket Cases

Post by David Lahey »

tat ty wrote:So ... As a total ignoramus on frame geometry ... And in complete awe of the amount of effort and precision you guys achieve ... I need to ask the question.

What noticeable advantage in handling would you expect that 5mm to deliver?

Alastair.

Maybe you need to have a test ride too!

The steering no longer pulls towards full lock in tight turns. This is very noticeable in rocky tight turns. The steering is also more stable going straight. The steering now feels a lot like a TY250.
Normal trail for a twinshock trials bike is something like 90mm. From memory, the KT has the shortest trail of the full sized 1970s trials bikes. 5mm more trail puts it closer to the ball park. JC1 will probably remember the trail dimensions of the various bikes.
relax, nothing is under control
David Lahey
Champion
Champion
Posts: 4117
Joined: Thu Jun 05, 2003 7:01 pm
Club: CQTC Inc, RTC Inc
Bike: Many Twinshocks
Location: Gladstone, Queensland

Re: Basket Cases

Post by David Lahey »

Here is a link to one of JC1's postings about the trail dimension of the KT
viewtopic.php?f=16&t=9348&hilit=steering&start=50
relax, nothing is under control
User avatar
Greg Harding
Golden Basket of Smiles
Posts: 908
Joined: Tue Mar 03, 2009 7:33 pm
Club: LRMTC & SQTA
Bike: NUMEROUS

Handlebar straightening revisited

Post by Greg Harding »

Hi Everyone,

Well it turns out that burying your head in the sand only works for a while so I have been busy lately straightening handlebars. This pair of hollow Magura handlebars proved particularly difficult :
1639597358436.jpg
1639597358436.jpg (78.13 KiB) Viewed 789 times

1639597398502.jpg
1639597398502.jpg (22.56 KiB) Viewed 789 times

1639597451006.jpg
1639597451006.jpg (30.93 KiB) Viewed 789 times

As you can see there is a considerable twist, this is how they came to me on a bike that I am pretty sure was not the bike that they were bent on.
Now that I have a nice secure mounting to hold the bars while working on them, I use bolt on bar clamps attached to a piece of channel to lever with. There are multiple holes in the channel so I can adjust the spacing to suit the rise of the bars length and this allows me to isolate the bend that I want to adjust. Alternately I can bolt either grip end in centre clamp to adjust top of rise bends
1639597480206.jpg
1639597480206.jpg (60.32 KiB) Viewed 789 times

Long levers and less force allows you to feel the bars yield but it is always a guesstimate as to whether it is enough as the flex is considerable. This works quite well for adjusting individual bends and it seems you need to break a few handlebars to develop a feel for how much you can load them up. Any scratch or nick in the bend you are working on can fracture under load along with corrosion on the inside you can't see!
1639599981587.jpg
1639599981587.jpg (53.55 KiB) Viewed 789 times

However removing twist is quite different with good quality handlebars like these and holding them is only one problem. The 2 tiedowns holding the left side down was a little optimistic, even 4 tiedowns was not enough! In the end I made a bracket to mount a crow bar to hold the left end down and a very long lever to lift the right side up. It is amazing how much force was needed to remove the twist, I found it better with one Centre clamp slightly loose to allow the bars to spin inside.
1639600871007.jpg
1639600871007.jpg (26.66 KiB) Viewed 789 times

There must be a calculation for working out the force to bend the handlebars out of shape in the first place and the shock loading would be spectacular!
Therefore straightening them again must be the reverse load but finding the direction and how much force can be elusive.....
2017 Newsflash: RUST IS THE NEW BLING !
Team Hardwood, the only licenced trials riders in Coffs Harbour!
Miles of Smiles
Greg Harding
David Lahey
Champion
Champion
Posts: 4117
Joined: Thu Jun 05, 2003 7:01 pm
Club: CQTC Inc, RTC Inc
Bike: Many Twinshocks
Location: Gladstone, Queensland

Re: Basket Cases

Post by David Lahey »

Greg it seems we have been straightening handlebars concurrently. In my case the bars are solid aluminium Inter-Am brand from the mid-1970s and I was working on them about 2 weeks ago.
I fitted a new set of these bars to my 325 :bultaco: Alpina in 1976 and they were definitely a cool thing at the time. Almost indestructible and a wonderful shape and lighter than the equally strong but very heavy steel Bultaco bars. Anyway those bars went out of my life when I sold that Alpina.
Roll on to about 10 years ago and I was able to acquire a set of those same type of Inter-Am bars from Lindsay Haig. They had been bent a bit but they were just the thing I wanted for an Alpina I was restoring at the time.
They didn't go on the :bultaco: Alpina though. I have just straightened them to use on my 1979 :suzuki SP370 trailbike. The SP370 still had the original lightweight unbraced :suzuki steel bars that are a strange high bend and they had been straightened a few too many times for my piece of mind.
The Inter-Am bars are slightly lower rise and feel excellent to ride with on the :suzuki SP370.
Attachments
20211212_142821.jpg
20211212_142821.jpg (1.49 MiB) Viewed 758 times
relax, nothing is under control
David Lahey
Champion
Champion
Posts: 4117
Joined: Thu Jun 05, 2003 7:01 pm
Club: CQTC Inc, RTC Inc
Bike: Many Twinshocks
Location: Gladstone, Queensland

Magura trials handlebars

Post by David Lahey »

Well those photos of the Magura bars being straightened by Greg also reminded me of the Magura trials bars on my :montesa Cota 348.
I see they have a different part number. These bars have a very high rise which suits the standard footpeg position on the :montesa Cota 348
Attachments
20211221_171021.jpg
20211221_171021.jpg (817.55 KiB) Viewed 753 times
relax, nothing is under control
David Lahey
Champion
Champion
Posts: 4117
Joined: Thu Jun 05, 2003 7:01 pm
Club: CQTC Inc, RTC Inc
Bike: Many Twinshocks
Location: Gladstone, Queensland

Re: Basket Cases

Post by David Lahey »

David Lahey wrote:Greg it seems we have been straightening handlebars concurrently. In my case the bars are solid aluminium Inter-Am brand from the mid-1970s and I was working on them about 2 weeks ago.
I fitted a new set of these bars to my 325 :Bultaco: Alpina in 1976 and they were definitely a cool thing at the time. Almost indestructible and a wonderful shape and lighter than the equally strong but very heavy steel Bultaco bars. Anyway those bars went out of my life when I sold that Alpina.
Roll on to about 10 years ago and I was able to acquire a set of those same type of Inter-Am bars from Lindsay Haig. They had been bent a bit but they were just the thing I wanted for an Alpina I was restoring at the time.
They didn't go on the :Bultaco: Alpina though. I have just straightened them to use on my 1979 :suzuki SP370 trailbike. The SP370 still had the original lightweight unbraced :suzuki steel bars that are a strange high bend and they had been straightened a few too many times for my piece of mind.
The Inter-Am bars are slightly lower rise and feel excellent to ride with on the :suzuki SP370.

I found a photo taken in 1976 of my model 99 :bultaco: 325 Alpina that shows the Inter-Am handlebars that I liked so much
Attachments
old bikes0008.JPG
old bikes0008.JPG (188.87 KiB) Viewed 713 times
relax, nothing is under control
User avatar
Greg Harding
Golden Basket of Smiles
Posts: 908
Joined: Tue Mar 03, 2009 7:33 pm
Club: LRMTC & SQTA
Bike: NUMEROUS

Re: Basket Cases

Post by Greg Harding »

Hi Everyone,
David Lahey wrote:Greg it seems we have been straightening handlebars concurrently. In my case the bars are solid aluminium Inter-Am brand from the mid-1970s and I was working on them about 2 weeks ago.
The Inter-Am bars are slightly lower rise and feel excellent to ride with on the :suzuki SP370.

David, it seems that we have riding :suzuki concurrently as well as I have been riding the SQUEAMISH. The handlebars were the low rise ones that I like on a RL but I was not happy about the fit up in the triple clamps as there was not enough straight in the Centre. One of the bikes that I have bought since I built the SQUEAMISH has supplied a better fitting set with an even better rise.
1640599103651.jpg
1640599103651.jpg (33.31 KiB) Viewed 692 times

It would be good to know what the part number means:
1640599073695.jpg
1640599073695.jpg (55.36 KiB) Viewed 692 times

In this case, the 4th and 5th digits must mean the width of the bars that goes into the clamp?
Your Inter-Am bars have quite a big radius on the bends and that limits where you can mount the perches. Not good for riding here as we run the perches closer together to avoid vines operating the levers when not expected. Are there any part numbers on the Inter-Am bars?
Here is my collection of solid bars that are not on bikes:
1640599233330.jpg
1640599233330.jpg (67.12 KiB) Viewed 692 times

Some look to have been anodised black, two are Trials bars and four are not and I can't find any identification.
1640599210093.jpg
1640599210093.jpg (82.09 KiB) Viewed 692 times

1640599137312.jpg
1640599137312.jpg (21.33 KiB) Viewed 692 times

These have big radius bends but are hollow, the knurled sections would be good for a :suzuki RL but the bend is wrong for me.
David Lahey wrote:Well those photos of the Magura bars being straightened by Greg also reminded me of the Magura trials bars on my :montesa Cota 348.
I see they have a different part number. These bars have a very high rise which suits the standard footpeg position on the :montesa Cota 348

David's RED Magura bars..... L467-21-00
My BLUE Magura bars.......... L475-21-00 are not Trials bars so in this case I think the 3rd and 4th digits are type????

Does anyone have a bether idea of what the codes mean?
2017 Newsflash: RUST IS THE NEW BLING !
Team Hardwood, the only licenced trials riders in Coffs Harbour!
Miles of Smiles
Greg Harding
David Lahey
Champion
Champion
Posts: 4117
Joined: Thu Jun 05, 2003 7:01 pm
Club: CQTC Inc, RTC Inc
Bike: Many Twinshocks
Location: Gladstone, Queensland

Re: Basket Cases

Post by David Lahey »

I reckon the black anodised solid bars third from the top look very much like my Inter-Am bars that went onto the :suzuki SP370. The shape, rise and the long curves are what I'm going by
relax, nothing is under control
David Lahey
Champion
Champion
Posts: 4117
Joined: Thu Jun 05, 2003 7:01 pm
Club: CQTC Inc, RTC Inc
Bike: Many Twinshocks
Location: Gladstone, Queensland

back to the 210cc TY175 motor

Post by David Lahey »

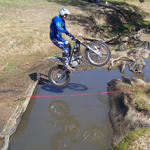
I finally got down to Brisbane a few weeks ago and so the story about the top end rebuild can continue.

There's a fair bit of technical stuff later in this story so I'll do a basic version first then give the detail:
Basic version:
The rings were stuck in their grooves in the piston in my 210cc TY175 motor. This reduced the performance. It was put together in about 2005 and had done countless trials since then. I could have cleaned the rings and the grooves and put it back together but George McKenzie who is the brains behind this motor had told me that Wossner were now making a piston that is better than what went into the motor in 2005 so that's what is happening now.

OK more technical stuff now:
The original piston that was used to fit the 72.5mm (big) bore was actually free to me because it was one of a batch made for an unnamed motorbike engine workshop in Brisbane and used to convert DT200s to 230cc and to put it mildly, they didn't work out well. More bluntly, every one they fitted seized. They worked out after a bit that the pistons had been made with the wrong amount of ovality. All pistons are oval at room temperature with the intention that when they are at operating temperature they become round. They need to be made this way because pistons grown more in one axis than the other due to the extra metal supporting the gudgeon pin.
Anyway in 2005 my old faithful 1975 TY175 cylinder had run out of oversizes and George convinced me to give the 210cc big-bore idea a go. George knew of those unwanted DT200/230 pistons and got one for me. The :yamaha TY175 sleeve was bored away completely and a new, bigger sleeve was fitted. It was made from a second hand :suzuki GS1000 sleeve. The ports were hand cut about 1 mm undersize and then taken out with porting tools to match the port dimensions after it was in place. The head was welded and machined to suit the bigger bore diameter (was 67 mm now 72.5mm) Standard bore is 66mm and nowadays you can buy 68 mm pistons and bore the standard sleeve to suit. You can't go much bigger than 68mm though with the standard sleeve.
The cylinder studs were lengthened so they ended above the head so flat nuts could be used instead of the long steel nuts that are standard. The stud holes in the head were reduced to the size of the studs. If not for this, there would be no sealing surface for the head gasket (the insides of the cylinder studs are very close to the OD of the sleeve). A weakness in having such long studs is that the motor has to be removed from the frame to get the cylinder off. Otherwise, all good.
The bottom end was disassembled so that the hole where the sleeve fits in could be machined bigger.
To get around the problem of the incorrect ovality, George hand-shaped the 2005 piston to get the ovality to where he reckoned it should be. In one of the photos you can still see the marks on the old piston where George did this bit of magic.
George also gave it a bit more clearance than normal to make sure it didn't seize and consequently it made a bit more more piston noise than a standard engine. I got used to the sound and greatly enjoyed the performance for all those years.
When the motor was first put together in 2005, it was very strong everywhere and a bit too responsive for the way I ride trials. First off I retarded the timing to dull it down a bit. It was also a fair bit easier to stall than a standard engine so I reduced the compression ratio, experimenting with different thickness (home-made) head gaskets. I ended up happy with the way it went at low revs but being a bit retarded it wasn't ideal at higher revs. I then fitted an electronic ignition with an advance curve and set it so that at low RPM it was where I had it before and the advance curve moved the timing to standard timing at higher RPM.
This was pretty good except that with the head gasket about 0.75 mm thicker than the standard thickness, I ended up with too much squish clearance which made for an annoying little bit of detonation just off closed throttle sometimes when it was fully hot.
A couple of years ago George told me that Wossner were making a piston that would work in that motor and that's what is in the photos. Being made by Wossner, we are very confident that this piston will have the ideal ovality.
Because the first 72.5mm piston was hand shaped, the skirt was actually a bit below normal diameter for a nominally 72.5mm piston, so George was able to hone the cylinder out a bit to provide the perfect cold clearance for the new 72.5 mm piston.
Things about the photos:
The piston is made for a :yamaha DT200 or :yamaha WR200 which have case reed induction. They only need that little cutaway at the base of the skirt. The TY175 is pre-case-reed :yamaha design and :yamaha used holes in the piston as part of the rear transfer porting back then. That's why I will need to cut holes in the new piston to make it like the one I cut the holes in back in 2005.
The new Wossner piston has a flat top near the top edge. Normally piston crowns have a gentle curve all the way to the edge. However remember that this piston is made to make a DT200 or WR200 into a 72.5mm bore and they have done this to the piston so that the DT200 cylinder head doesn't have to be machined to a bigger diameter combustion chamber.
It will be interesting to see if I can get away with this piston crown feature in my motor and still have a good squish design.
Attachments
20220104_190546.jpg
20220104_190546.jpg (1.48 MiB) Viewed 622 times
20220104_190630.jpg
20220104_190630.jpg (1.26 MiB) Viewed 622 times
20220104_190654.jpg
20220104_190654.jpg (1.79 MiB) Viewed 622 times
20220104_190811.jpg
20220104_190811.jpg (1.28 MiB) Viewed 622 times
relax, nothing is under control
David Lahey
Champion
Champion
Posts: 4117
Joined: Thu Jun 05, 2003 7:01 pm
Club: CQTC Inc, RTC Inc
Bike: Many Twinshocks
Location: Gladstone, Queensland

progress on the 210cc TY175 motor top end rebuild

Post by David Lahey »

Since last installment I've stripped the old paint off the cylinder and head and am in the process of deciding whether to paint it or have it vapour blasted
Attachments
20220109_150226_HDR.jpg
20220109_150226_HDR.jpg (1.31 MiB) Viewed 578 times
20220109_150237.jpg
20220109_150237.jpg (1.43 MiB) Viewed 578 times
20220109_150300.jpg
20220109_150300.jpg (1.46 MiB) Viewed 578 times
relax, nothing is under control
Post Reply