Page 293 of 324
Re: New boot fix
Posted: Thu Mar 31, 2022 7:14 pm
by David Lahey
brent j wrote:David Lahey wrote:I bought some new boots and on most bikes they were great but on one bike the top edge of the sole would get caught under the edge of the stand mount at critical times when riding.
20220226_112610.jpg
20220226_111637.jpg
I thought about modifying the boot sole but decided to try making a boot heel deflector instead. It's made of 3 mm HDPE and worked well on a brief test ride this morning. Much more testing required but it is ridiculously hot and humid here this morning.
20220226_112307.jpg
I had the same problem with my PE250B. I did the same thing we did back in the 70's and brazed a short piece of tube under the brake pedal tip and under the brake cable anchor on the frame.
The front of the sole edge would catch under the brake when I moved back and the back edge of the sole would catch under the cable anchor when I leant forward. The piece of tube (15mm dia) gets welded on an angle so creates a ramp.
I ended up doing the same of the brake pedal on my RL
Hi Brent can you do photo/s of that at some point? I think I know what you mean but I'm not certain
Re: New boot fix
Posted: Sun Apr 03, 2022 12:10 am
by brent j
David Lahey wrote:brent j wrote:David Lahey wrote:I bought some new boots and on most bikes they were great but on one bike the top edge of the sole would get caught under the edge of the stand mount at critical times when riding.
The attachment 20220226_112610.jpg is no longer available
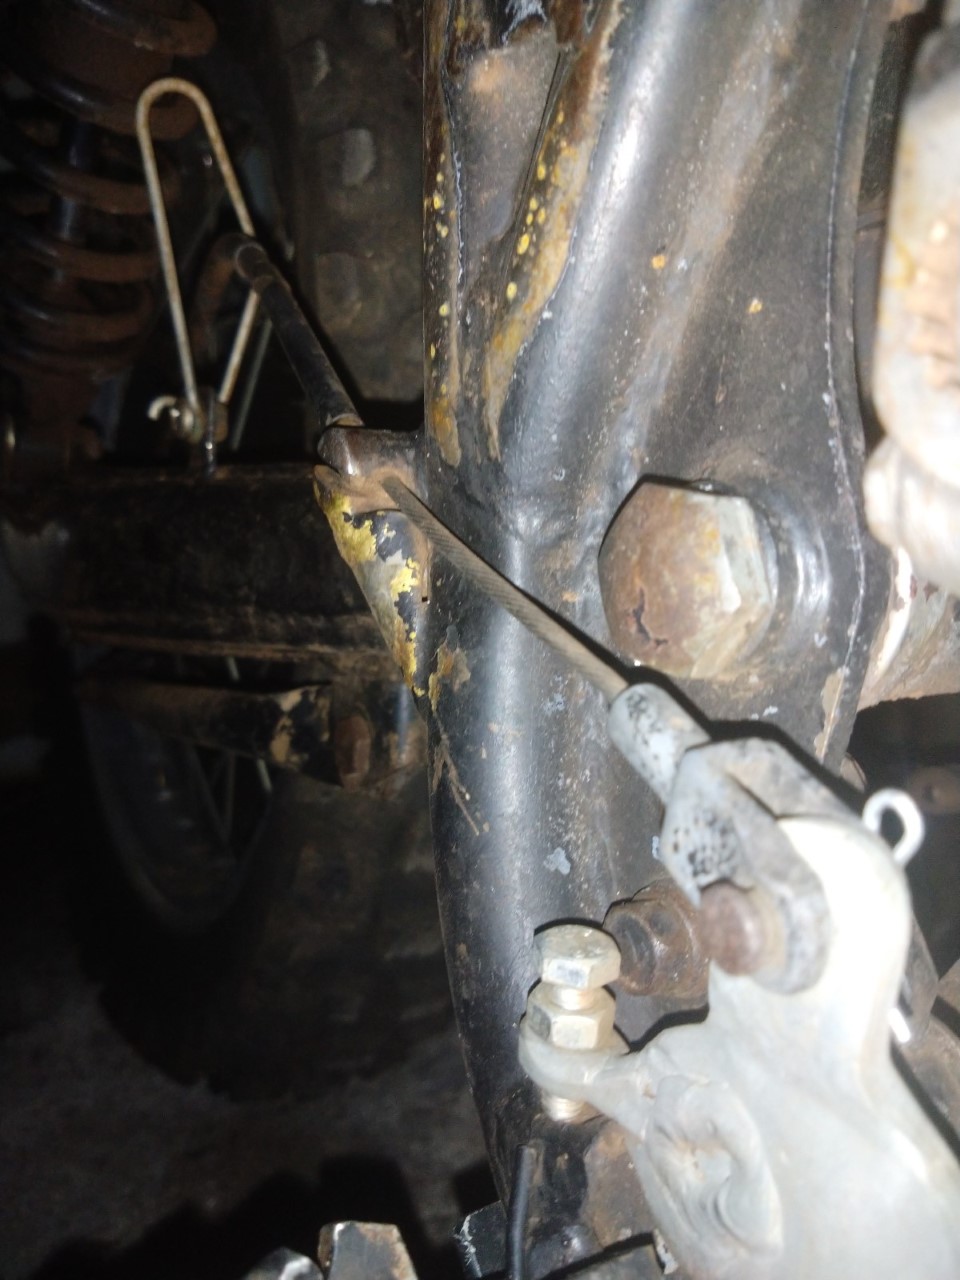
- PE brake 1.jpg (189.34 KiB) Viewed 916 times
I thought about modifying the boot sole but decided to try making a boot heel deflector instead. It's made of 3 mm HDPE and worked well on a brief test ride this morning. Much more testing required but it is ridiculously hot and humid here this morning.
- PE brake 1.jpg (189.34 KiB) Viewed 916 times
I had the same problem with my PE250B. I did the same thing we did back in the 70's and brazed a short piece of tube under the brake pedal tip and under the brake cable anchor on the frame.
The front of the sole edge would catch under the brake when I moved back and the back edge of the sole would catch under the cable anchor when I leant forward. The piece of tube (15mm dia) gets welded on an angle so creates a ramp.
I ended up doing the same of the brake pedal on my RL
Hi Brent can you do photo/s of that at some point? I think I know what you mean but I'm not certain
Re: Basket Cases
Posted: Mon Apr 04, 2022 12:16 pm
by David Lahey
Thank you Brent. I get it now. Very neat
setting the squish on 210cc Ty175
Posted: Fri Apr 08, 2022 7:49 am
by David Lahey
This is a continuation of the top-end refurb I'm doing on my 210cc TY175 motor.
Until this week, this had involved replacing the no-name 72.5mm piston with a Wossner 72.5mm piston and the bore being honed to fit the Wosssner. I also stripped the paint from the cylinder and cylinder head finning and had it vapour blasted.
This week I used a friend's lathe to machine the head to achieve a squish of 1.2mm. The squish zone is the outer part of the combustion chamber where the piston crown is parallel with the surface of the head. Minimising the squish improves the combustion process.
Reducing the squish also requires increasing the volume of the combustion dome to get the combustion chamber back to the ideal total volume. I took the opportunity to reshape the dome to more closely resemble a modern (KTM) head design in that it is no longer a dome. It has a flat top (the bit around the spark plug) and the sides are now parallel.
One photo shows the head after machining and before a final tidy-up.
The other photo shows checking the squish using plasticine.
Re: Basket Cases
Posted: Sat Apr 09, 2022 10:21 am
by Jools
"One photo shows the head after machining and before a final tidy-up."
... And a couple of RC Soarers by the look of it.
Re: Basket Cases
Posted: Sat Apr 09, 2022 7:57 pm
by David Lahey
Jools wrote:"One photo shows the head after machining and before a final tidy-up."
... And a couple of RC Soarers by the look of it.
That shed is chokkers with models
another 210cc TY175 motor update
Posted: Tue Apr 12, 2022 9:55 am
by David Lahey
It was suggested to me that I should do some more lightening of the piston before assembling the top end.
Yesterday was my RDO and I got stuck into removing some of the extraneous metal up near the crown using a few different shaped burrs.
After about 2 hours and 2.5 Makita batteries, the piston was a bit lighter and looked like this:
Re: Basket Cases
Posted: Thu Apr 14, 2022 6:39 pm
by DoAll
Hello,
I thought I would share one of my basket cases, not really but a non-runner, found a petcock for the tank , cleaned the carby done a compression test =130psi, a few kicks and RUNNING!
The only issue is that the clutch seams to engage very abruptly in the last 1/4 of lever travel, is that normal, any way to improve the clutch action.
Thanks
Re: Basket Cases
Posted: Thu Apr 14, 2022 9:07 pm
by David Lahey
A common reason for what you describe with the clutch action is that the drive fingers on the basket develop dents, hollows or grooves where the drive tabs of the friction plates touch them. The grooves can act like ramps, pulling the plates together as the clutch engages. The fix is to make the edges of the fingers flat again. This can be done by filing if you are talented enough to be able to do it the same to each finger and do it square and flat. I used to file them flat with reasonable success but a much better (and quicker) result can be achieved using a milling machine so I now pay someone to do it on their milling machine.
The clutch hub can also develop grooves from the drive edges of the steel plates.
Another thing that can cause a similar effect is friction in the worm actuator or the cable or the pushrod causing the pushrod to move in little jumps.
The clutch cover from a

TM250 and from one particular year model of the
TS250 fit the
RL250 motor for a better action (they have a rack and pinion actuator) but they are not easy to find.
Re: another 210cc TY175 motor update
Posted: Mon Apr 18, 2022 7:26 pm
by David Lahey
David Lahey wrote:It was suggested to me that I should do some more lightening of the piston before assembling the top end.
Yesterday was my RDO and I got stuck into removing some of the extraneous metal up near the crown using a few different shaped burrs.
After about 2 hours and 2.5 Makita batteries, the piston was a bit lighter and looked like this:
I put the 210cc TY175 back together yesterday afternoon and so far have given the new top end two heat cycles.
As expected there's a lot less mechanical noise with the Wossner piston.
The rings need more running in before I can properly test how well it runs.
There's a local trial next Sunday at the Blockspot at Rosedale and I'm hoping I can get it run in well enough to be able to ride the trial.